

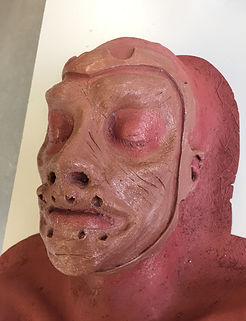


Moulding Sculpt
Order of Process:
-Mould release
-Gel coat layer and a
Mud mixture (talc and gel coat) in touch-downs in the grounding
-fine surface tissue
-lay-up resin
-chop strand matting
-fine surface tissue
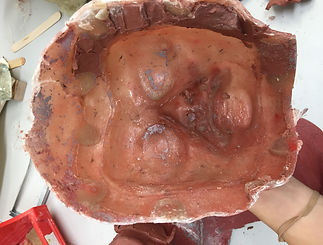


When I tried to demould, I found that the excess fibreglass had curved uner the chin and onto the neck, acting as an undercut. This made it very difficult to sepaate the mould from the core. The neck layer making it impossible to find the edge of the fibreglass to break the suction.
To overcome this problem, I used a hammer, chisel and wooden wedges to free the mould as much as i could, from this point i used the vibrasaw to saw around th edges of the mould. Carefully i sawed the border of my core off, as this was preventing me from having enough room for leverage. I then sawed into the mould, avoiding damaging the core, and eventually the thick edge of the mould enabled me to continue to pack in wooden wedges between the core and mould, until it eventually broke the suction and i was able to remove the mould.
As a result I broke the ears off of my core, however this was not an issue as I do not need these ears as I have separate ones to work from. From this I learnt not to include ears on all cores as somethimes they will intrude and create an undercut. I plan to tidy up the core and patching any negative space wiwth car body filler. I will then seal and spray paint these areas to match the rest of the core.
Next time I will be careful about how much excess material is outside of the grounding. I wil also consider ears on the core and whether I need them on there.

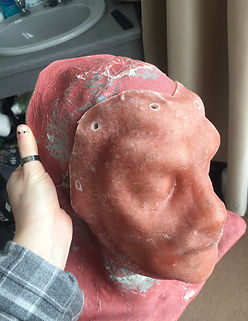

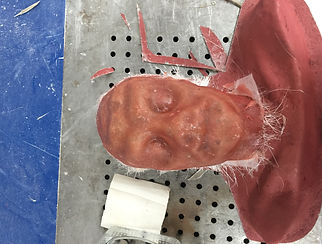
Once demoulded, I cleaned off the clay from the core and put the mould back on to drill the bolt holes. I then drilled two of the thickest areas intot he core, for my injection holes. I will run a test piece with gelatine. To ensure I have thin edges, I made sure the fibreglass was tight to the eyes. If this doesnt work, I will redo this using touch downs in the eyes.
Once I had already moulded my sculpt, I realised that I hadn't included touchdowns in the eyes. I was worried that this would cause issues when trying to achieve thin blending edges.
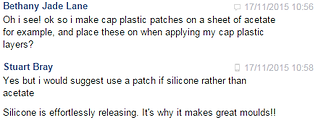
To overcome this problem, I shared my problem with Stuart Bray, a makeup artist from the industry. The evidence to the left displays his suggestions which I will later apply if necessary.
To make the cap plastic patches, I applied layers of cap plastic to a sheet of acetate, which will then be applied to the unsuccessful edges of the prosthetic piece during application, using Pros-aide or Telesis.
I later spoke to Stuart Bray in person at the Prosthetics Event about this issue, where he was able to explain this method further from his own experience.
This advice was very helpful and I did make a few patches in preparation for my final makeup. I used a couple of patches to disguise small edges around the eyes.


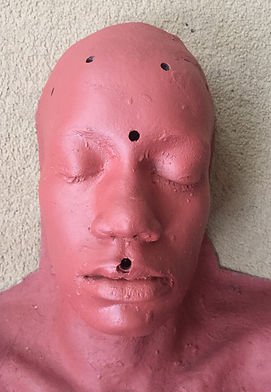


Cleaning up core
After breaking the ears off of the core to make it easier to work with, I patched up the holes left using car body filer. I then sanded down and spray painted this area to match the rest of the core. I felt that this made my core look neater and more professional, although there are still things I would change to imporve the appearance fo my core.